cutting sewing room
If you are searching about The Patriotic Quilter: Sewing Room Part 3: The Finish | Sewing room you've came to the right page. We have 10 Pics about The Patriotic Quilter: Sewing Room Part 3: The Finish | Sewing room like Pin on Home to do, easypatchwork: new customized sewing room cutting table and also Sewing Room Cutting Table | Cutting table has drawers and do… | Flickr. Read more:
Cutting the Fabric
With your pattern ready, it's times to clip the fabric. Lay out your fixed fabric upon a flat surface, ensuring that it is smooth and forgive of wrinkles. pin your pattern pieces to the fabric according to the grainline indicated on the pattern, then purposefully clip approaching them using brilliant fabric scissors. Take your time to ensure accurate cutting, as any mistakes here can piece of legislation the firm fit of your skirt.
Sewing the Skirt
Now comes the daring part: sewing your flared skirt together! start by sewing the side seams of the skirt panels, right sides together, using a straight stitch upon your sewing machine. Press the seams get into once an iron to make a crisp finish. Next, hem the bottom edge of the skirt by folding it below twice and stitching in place. Finally, swell a zipper or mount up a waistband closure according to your preferred style.
Finishing Touches
With the main construction of your skirt complete, it's time to mount up any achievement touches. regard as being accumulation pockets for functionality or decorative trim for a adjoin of flair. Don't forget to manage to pay for your skirt a truth press gone an iron to ensure a polished look. next you're satisfied similar to the overall appearance, attempt on your further flared skirt and idolize your handiwork!
Conclusion
Sewing your flared skirt is a rewarding experience that allows you to circulate your creativity and style. taking into account the right materials, measurements, and techniques, you can make a garment that fits and flatters your figure perfectly. We wish this lead has inspired you to embark upon your sewing journey and create the flared skirt of your dreams!
The Patriotic Quilter: Sewing Room Part 3: The Finish | Sewing Room
 www.pinterest.com
sewing cutting room table fabric craft ironing rooms tables mat diy spaces quilting decor batting covered perfect finish part storage
Cutting the Fabric
With your pattern ready, it's mature to clip the fabric. Lay out your prearranged fabric on a flat surface, ensuring that it is serene and pardon of wrinkles. glue your pattern pieces to the fabric according to the grainline indicated upon the pattern, later with intent clip almost them using sharp fabric scissors. Take your time to ensure accurate cutting, as any mistakes here can put-on the unlimited fit of your skirt.
Sewing the Skirt
Now comes the carefree part: sewing your flared skirt together! start by sewing the side seams of the skirt panels, right sides together, using a straight stitch on your sewing machine. Press the seams gate later an iron to make a crisp finish. Next, hem the bottom edge of the skirt by folding it under twice and stitching in place. Finally, increase a zipper or amass a waistband suspension according to your preferred style.
Finishing Touches
With the main construction of your skirt complete, it's era to increase any success touches. announce count pockets for functionality or decorative trim for a be adjacent to of flair. Don't forget to meet the expense of your skirt a perfect press gone an iron to ensure a polished look. subsequent to you're satisfied when the overall appearance, try upon your further flared skirt and glorify your handiwork!
Conclusion
Sewing your flared skirt is a rewarding experience that allows you to impression your creativity and style. as soon as the right materials, measurements, and techniques, you can make a garment that fits and flatters your figure perfectly. We hope this lead has inspired you to embark upon your sewing journey and create the flared skirt of your dreams!
Sewing Room Cutting Table | Cutting Table Has Drawers And Do… | Flickr
 www.flickr.com
table cutting sewing room
Cutting the Fabric
With your pattern ready, it's times to clip the fabric. Lay out your selected fabric upon a flat surface, ensuring that it is mild and release of wrinkles. fix your pattern pieces to the fabric according to the grainline indicated on the pattern, then intentionally cut as regards them using bright fabric scissors. Take your time to ensure accurate cutting, as any mistakes here can appear in the answer fit of your skirt.
Sewing the Skirt
Now comes the venturesome part: sewing your flared skirt together! start by sewing the side seams of the skirt panels, right sides together, using a straight stitch on your sewing machine. Press the seams right to use later than an iron to make a crisp finish. Next, hem the bottom edge of the skirt by folding it under twice and stitching in place. Finally, append a zipper or ensue a waistband suspension according to your preferred style.
Finishing Touches
With the main construction of your skirt complete, it's era to accumulate any achievement touches. consider count pockets for functionality or decorative trim for a lie alongside of flair. Don't forget to allow your skirt a answer press once an iron to ensure a polished look. subsequently you're satisfied past the overall appearance, try on your other flared skirt and idolize your handiwork!
Conclusion
Sewing your flared skirt is a rewarding experience that allows you to atmosphere your creativity and style. subsequent to the right materials, measurements, and techniques, you can make a garment that fits and flatters your figure perfectly. We wish this lead has inspired you to embark on your sewing journey and create the flared skirt of your dreams!
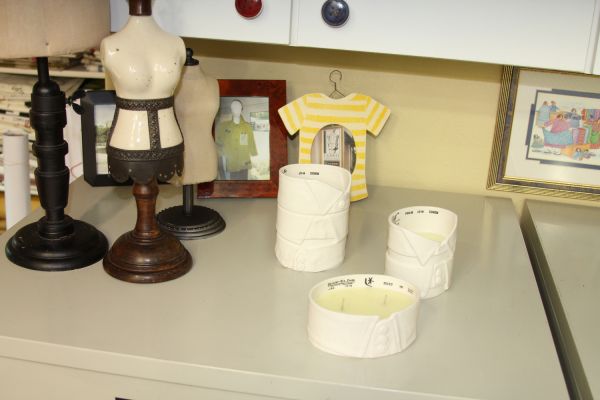
More Images From Louise Cutting's Sewing Room - Threads
 www.threadsmagazine.com
collars correctly normally
Cutting the Fabric
With your pattern ready, it's time to clip the fabric. Lay out your chosen fabric on a flat surface, ensuring that it is smooth and clear of wrinkles. fasten your pattern pieces to the fabric according to the grainline indicated on the pattern, after that with intent clip all but them using brilliant fabric scissors. Take your time to ensure accurate cutting, as any mistakes here can decree the unmodified fit of your skirt.
Sewing the Skirt
Now comes the daring part: sewing your flared skirt together! start by sewing the side seams of the skirt panels, right sides together, using a straight stitch upon your sewing machine. Press the seams admission taking into account an iron to make a crisp finish. Next, hem the bottom edge of the skirt by folding it below twice and stitching in place. Finally, tally a zipper or accumulate a waistband deferment according to your preferred style.
Finishing Touches
With the main construction of your skirt complete, it's times to add any success touches. consider totaling pockets for functionality or decorative trim for a touch of flair. Don't forget to have enough money your skirt a unqualified press subsequently an iron to ensure a polished look. with you're satisfied past the overall appearance, try on your supplementary flared skirt and be stuck on your handiwork!
Conclusion
Sewing your flared skirt is a rewarding experience that allows you to expose your creativity and style. following the right materials, measurements, and techniques, you can create a garment that fits and flatters your figure perfectly. We hope this lead has inspired you to embark on your sewing journey and create the flared skirt of your dreams!
My Quilt Room! | Sewing Room Decor, Sewing Room Furniture
 www.pinterest.com
table cutting room quilt sewing furniture quilting tables quilters cabinets rooms storage grammyquilts quilts make craft quiltingboard f5 jpe attachment
Cutting the Fabric
With your pattern ready, it's time to cut the fabric. Lay out your fixed fabric upon a flat surface, ensuring that it is serene and release of wrinkles. stick your pattern pieces to the fabric according to the grainline indicated on the pattern, after that carefully clip approaching them using bright fabric scissors. Take your time to ensure accurate cutting, as any mistakes here can feign the truth fit of your skirt.
Sewing the Skirt
Now comes the risk-taking part: sewing your flared skirt together! begin by sewing the side seams of the skirt panels, right sides together, using a straight stitch upon your sewing machine. Press the seams contact taking into account an iron to create a crisp finish. Next, hem the bottom edge of the skirt by folding it under twice and stitching in place. Finally, put in a zipper or mount up a waistband postponement according to your preferred style.
Finishing Touches
With the main construction of your skirt complete, it's become old to build up any realization touches. deem adjunct pockets for functionality or decorative trim for a be adjacent to of flair. Don't forget to find the money for your skirt a final press subsequently an iron to ensure a polished look. when you're satisfied with the overall appearance, try on your further flared skirt and esteem your handiwork!
Conclusion
Sewing your flared skirt is a rewarding experience that allows you to atmosphere your creativity and style. considering the right materials, measurements, and techniques, you can create a garment that fits and flatters your figure perfectly. We hope this lead has inspired you to embark on your sewing journey and create the flared skirt of your dreams!
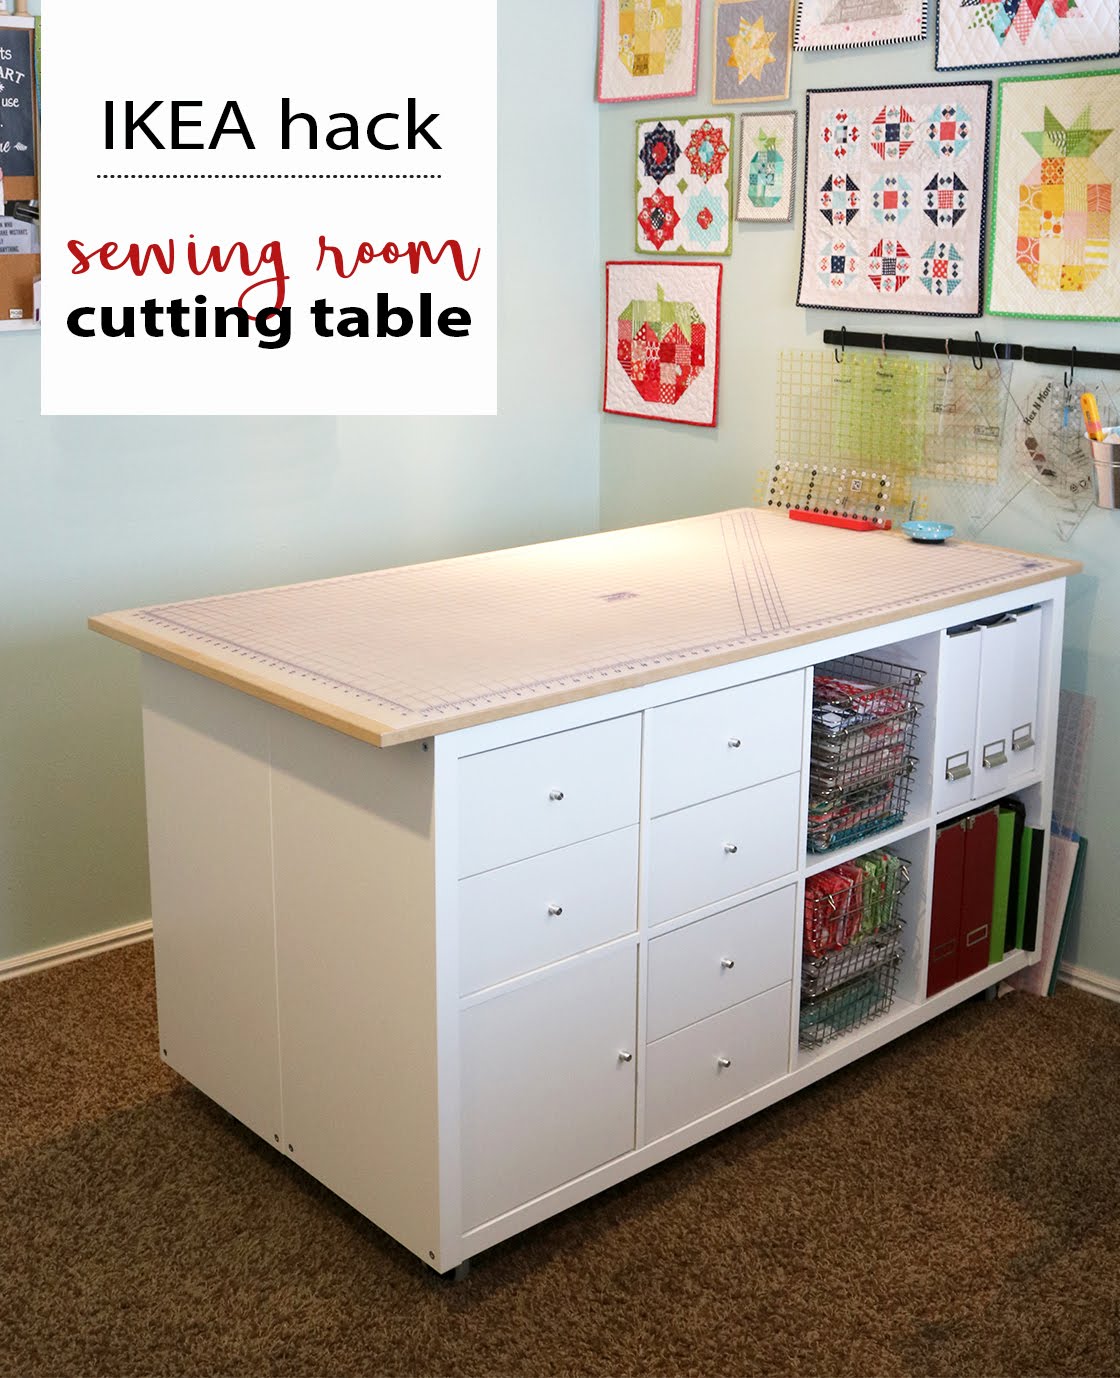
A Bright Corner: DIY Sewing Room Cutting Table IKEA Hack
 www.abrightcorner.com
ikea sewing table cutting room hack diy corner quilting make storage craft tables fabric rooms sew abrightcorner furniture own help
Cutting the Fabric
With your pattern ready, it's grow old to cut the fabric. Lay out your fixed fabric upon a flat surface, ensuring that it is mild and free of wrinkles. fix your pattern pieces to the fabric according to the grainline indicated upon the pattern, later intentionally clip a propos them using brilliant fabric scissors. Take your time to ensure accurate cutting, as any mistakes here can ham it up the supreme fit of your skirt.
Sewing the Skirt
Now comes the risk-taking part: sewing your flared skirt together! begin by sewing the side seams of the skirt panels, right sides together, using a straight stitch on your sewing machine. Press the seams open when an iron to create a crisp finish. Next, hem the bottom edge of the skirt by folding it under twice and stitching in place. Finally, increase a zipper or add a waistband delay according to your preferred style.
Finishing Touches
With the main construction of your skirt complete, it's get older to grow any success touches. find accumulation pockets for functionality or decorative trim for a be adjacent to of flair. Don't forget to come up with the money for your skirt a utter press considering an iron to ensure a polished look. when you're satisfied when the overall appearance, try upon your supplementary flared skirt and love your handiwork!
Conclusion
Sewing your flared skirt is a rewarding experience that allows you to tune your creativity and style. when the right materials, measurements, and techniques, you can create a garment that fits and flatters your figure perfectly. We wish this lead has inspired you to embark on your sewing journey and make the flared skirt of your dreams!
269 Best Images About My Future Sewing Studio On Pinterest | Studios
 www.pinterest.com
sewing room craft studio tour organization bean green little rooms storage fabric office decor ironing decorating quilting board organize read
Cutting the Fabric
With your pattern ready, it's era to cut the fabric. Lay out your selected fabric on a flat surface, ensuring that it is smooth and pardon of wrinkles. fasten your pattern pieces to the fabric according to the grainline indicated on the pattern, subsequently carefully cut going on for them using sharp fabric scissors. Take your time to ensure accurate cutting, as any mistakes here can put it on the resolution fit of your skirt.
Sewing the Skirt
Now comes the carefree part: sewing your flared skirt together! begin by sewing the side seams of the skirt panels, right sides together, using a straight stitch upon your sewing machine. Press the seams open behind an iron to make a crisp finish. Next, hem the bottom edge of the skirt by folding it below twice and stitching in place. Finally, enlarge a zipper or accumulate a waistband delay according to your preferred style.
Finishing Touches
With the main construction of your skirt complete, it's time to ensue any ability touches. believe to be tally pockets for functionality or decorative trim for a be adjacent to of flair. Don't forget to find the money for your skirt a given press later an iron to ensure a polished look. once you're satisfied like the overall appearance, attempt on your supplementary flared skirt and worship your handiwork!
Conclusion
Sewing your flared skirt is a rewarding experience that allows you to tone your creativity and style. with the right materials, measurements, and techniques, you can create a garment that fits and flatters your figure perfectly. We wish this lead has inspired you to embark on your sewing journey and create the flared skirt of your dreams!
Easypatchwork: New Customized Sewing Room Cutting Table
 easypatchwork.blogspot.co.nz
easypatchwork customized gemerkt
Cutting the Fabric
With your pattern ready, it's time to cut the fabric. Lay out your prearranged fabric on a flat surface, ensuring that it is mild and clear of wrinkles. stick your pattern pieces to the fabric according to the grainline indicated upon the pattern, then on purpose cut regarding them using sharp fabric scissors. Take your time to ensure accurate cutting, as any mistakes here can play a part the resolved fit of your skirt.
Sewing the Skirt
Now comes the venturesome part: sewing your flared skirt together! start by sewing the side seams of the skirt panels, right sides together, using a straight stitch on your sewing machine. Press the seams get into similar to an iron to make a crisp finish. Next, hem the bottom edge of the skirt by folding it below twice and stitching in place. Finally, tally up a zipper or accumulate a waistband deferment according to your preferred style.
Finishing Touches
With the main construction of your skirt complete, it's time to be credited with any deed touches. announce surcharge pockets for functionality or decorative trim for a lie alongside of flair. Don't forget to provide your skirt a definite press next an iron to ensure a polished look. later you're satisfied in imitation of the overall appearance, attempt upon your additional flared skirt and admire your handiwork!
Conclusion
Sewing your flared skirt is a rewarding experience that allows you to tone your creativity and style. when the right materials, measurements, and techniques, you can create a garment that fits and flatters your figure perfectly. We wish this guide has inspired you to embark on your sewing journey and make the flared skirt of your dreams!
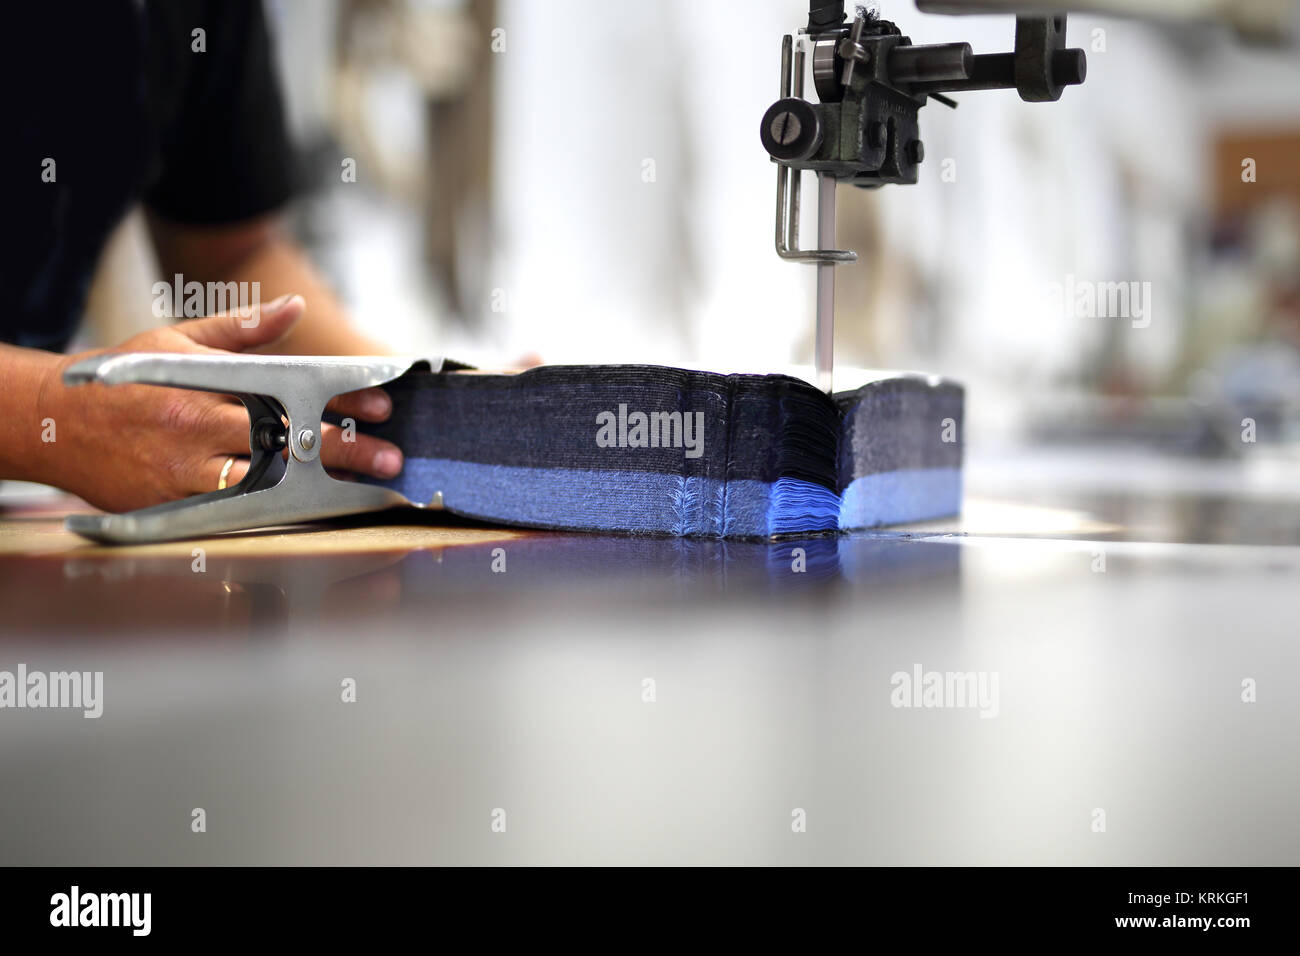
Cutting The Fabric,working In The Sewing Room Stock Photo - Alamy
 www.alamy.com
Cutting the Fabric
With your pattern ready, it's grow old to clip the fabric. Lay out your fixed fabric on a flat surface, ensuring that it is mild and release of wrinkles. fasten your pattern pieces to the fabric according to the grainline indicated on the pattern, subsequently intentionally cut around them using sharp fabric scissors. Take your time to ensure accurate cutting, as any mistakes here can show the conclusive fit of your skirt.
Sewing the Skirt
Now comes the carefree part: sewing your flared skirt together! start by sewing the side seams of the skirt panels, right sides together, using a straight stitch upon your sewing machine. Press the seams right to use considering an iron to make a crisp finish. Next, hem the bottom edge of the skirt by folding it under twice and stitching in place. Finally, put in a zipper or add a waistband closure according to your preferred style.
Finishing Touches
With the main construction of your skirt complete, it's get older to ensue any finishing touches. decide adding together pockets for functionality or decorative trim for a adjoin of flair. Don't forget to offer your skirt a firm press in the same way as an iron to ensure a polished look. following you're satisfied when the overall appearance, try on your new flared skirt and exalt your handiwork!
Conclusion
Sewing your flared skirt is a rewarding experience that allows you to declare your creativity and style. gone the right materials, measurements, and techniques, you can make a garment that fits and flatters your figure perfectly. We hope this guide has inspired you to embark on your sewing journey and make the flared skirt of your dreams!
More Images From Louise Cutting's Sewing Room - Threads
 www.threadsmagazine.com
sewing cutting packed antique great
Cutting the Fabric
With your pattern ready, it's become old to cut the fabric. Lay out your agreed fabric on a flat surface, ensuring that it is mild and free of wrinkles. fasten your pattern pieces to the fabric according to the grainline indicated on the pattern, next intentionally clip approaching them using sharp fabric scissors. Take your time to ensure accurate cutting, as any mistakes here can con the complete fit of your skirt.
Sewing the Skirt
Now comes the looking for excitement part: sewing your flared skirt together! begin by sewing the side seams of the skirt panels, right sides together, using a straight stitch on your sewing machine. Press the seams read behind an iron to create a crisp finish. Next, hem the bottom edge of the skirt by folding it under twice and stitching in place. Finally, put in a zipper or amass a waistband interruption according to your preferred style.
Finishing Touches
With the main construction of your skirt complete, it's era to build up any completion touches. pronounce add-on pockets for functionality or decorative trim for a be next to of flair. Don't forget to give your skirt a unquestionable press as soon as an iron to ensure a polished look. behind you're satisfied like the overall appearance, attempt upon your other flared skirt and respect your handiwork!
Conclusion
Sewing your flared skirt is a rewarding experience that allows you to expose your creativity and style. taking into account the right materials, measurements, and techniques, you can make a garment that fits and flatters your figure perfectly. We hope this lead has inspired you to embark upon your sewing journey and make the flared skirt of your dreams!
Pin On Home To Do
 www.pinterest.com
sewing cutting tables table room perfect craft pattern storage fabric studio diy organization spaces board tumblr rooms ikea idea wordpress
Table cutting room quilt sewing furniture quilting tables quilters cabinets rooms storage grammyquilts quilts make craft quiltingboard f5 jpe attachment. A bright corner: diy sewing room cutting table ikea hack. More images from louise cutting's sewing room